How to Install Elbow Groove Fittings: A Step-by-Step Guide
2026-07-13 11:17:12


When Elbow-Groove fittings are installed properly, complicated pipe projects become reliable, efficient systems. When you need to change the direction of your pipe network by 90° or 45°, the Elbow-Groove connection system lets you do it quickly without losing power. Traditional welding requires hot work permits and qualified welders. Elbow-Groove fittings with precisely machined grooves can accept mechanical connections in minutes, instead of having to go through time-consuming threading or fusion processes. This useful guide shows procurement managers, site leaders, and installation teams tried-and-true ways to make joints that don't leak in fire protection, HVAC, water supply, and industrial pipes.

Specification |
|||
| Nominal Diameter (mm) | Steel Pipe Outer Diameter (mm) | Nominal Pressure(MPa) | Unit |
| 50 | 60 | 2.5 | Piece |
| 65 | 76 | 2.5 | Piece |
| 80 | 89 | 2.5 | Piece |
| 100 | 114 | 2.5 | Piece |
| 125 | 140 | 2.5 | Piece |
| 150 | 165 | 2.5 | Piece |
| 200 | 219 | 2.5 | Piece |
Understanding Elbow Groove Fittings: Definition, Types, and Applications
What Makes Grooved Elbows Different?
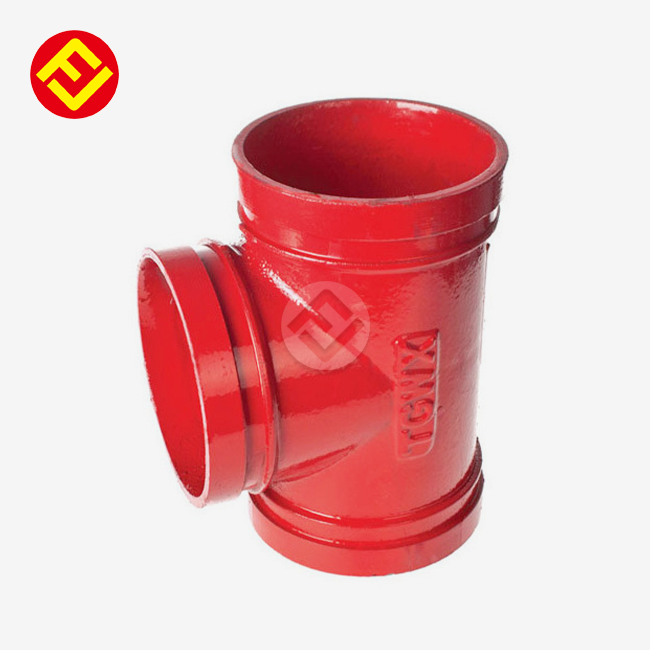
Elbow-Groove fits are a special kind of directional connection that has grooves around the outside of each end. These holes can fit mechanical links with elastomeric gaskets, which lets you make strong, sealed joints without welding. The system depends on precise groove geometry that meets standards like AWWA C606. This makes sure that Products" target="_blank" style="color:blue" >products from different makers can work together as long as the specs are the same.
The main difference is in how the operation is done. For traditional ways to work, they need trained welders and a lot of time to cool down. With Elbow-Groove systems, field teams can put together pipe networks with simple hand tools, which cuts down on project timelines by a lot. The housing of the mechanical coupling fits into the gap, and the gasket creates a pressure seal. This makes a union at every point that lets the parts move freely during earthquakes or temperature changes.
Material Options and Their Applications
Modern Elbow-Grooves are made from two main types of materials, each of which has its own specific use. Ductile iron fittings that meet ASTM A536 Grade 65-45-12 have a tensile strength of up to 65,000 psi, which makes them perfect for fire protection networks and high-pressure water systems in cities. Impact strength of the material keeps it from breaking during pressure spikes or water hammer events that happen when sprinklers are turned on.
Corrosive conditions and high temperatures can be dealt with by carbon steel types that are treated with epoxy or galvanized finishes. After casting and cutting, the covering process starts. Hot-dip galvanizing according to ASTM A153 protects with zinc in outdoor settings or chemical processing plants. Epoxy powder covering, which is usually red for fire systems, protects against rust and makes the system easy to spot. Choosing the right material depends on the conditions it will be used in. For example, malleable iron is best for normal water service, while treated carbon steel is better for harsh conditions.
Angle Configurations: 90° vs. 45° Elbows
Choosing between 45-degree and 90-degree fits changes both how well the hydraulics work and how easy it is to install. For riser systems, equipment links, and grid patterns in business buildings, standard 90° Elbow-Grooves make changes in direction that are perpendicular. These fittings keep system pressure levels at up to 2.5 MPa nominal, which is enough for most business and light industry needs.
On the other hand, 45° bends make pumping systems more efficient by reducing flow turbulence and pressure drop. If there is enough room, two 45° joints can be used instead of one 90° Elbow-Groove. This makes fluid changes smoother and reduces friction losses. In HVAC cold water loops, where pump energy costs add up over decades, the softer angle is helpful. Choosing the right angle during the buying process maximizes both the room for installation and the long-term efficiency of operations.
Preparing for Installation: Tools, Materials, and Safety Protocols
Essential Tools and Equipment
Choosing the right tools is the first step to installing an Elbow-Groove fitting correctly. Your team needs either a hydraulic snap cutter or a band saw with the right tools to cut pipes and make ends that are straight and free of burrs. Cutting flaws make it impossible for the gasket to sit properly, which weakens the seal. A deburring tool smooths out sharp edges that could damage gaskets when they are put together after they have been cut.
Tightening coupling bolts can be done with a standard adjustable wrench or socket set. However, torque tools give more uniform results on big setups. Many guidelines call for normal coupling bolts to have a torque of 65 to 75 ft-lbs. This makes sure that the bolts are properly compressed without putting too much stress on the parts. Support stands or roller systems keep pipes stable while workers place fittings so that they are lined up correctly during assembly. Marking and measuring lines make sure that the space between groove centers is correct, keeping design gaps.
Material Inspection and Quality Verification
Before you start installing, you should check all of the parts for production flaws and damage from shipping. Carefully look at the groove's dimensions—the depth, width, and shape must all meet the coupling's requirements. Even small changes can stop the key from properly engaging, which lets the joint separate when pressure is applied. Make sure the layer is still on the whole surface and write down any chips, cracks, or bare metal that could cause rust.
Same care should be taken with gaskets. Nitrile is good for working with oil-based products, while EPDM rubber is good for water and fire protection systems that can handle temperatures from -30°F to 230°F. Make sure the material of the seal fits the fluid and temperature profile. Keep gaskets out of direct sunshine and ozone sources, which break down rubber materials. When you get couplings, the bolt sets should be whole and there should be protection caps over the bolt holes to keep dirt out.
Safety Standards and Compliance Requirements
Safety measures keep people safe and make sure that regulations are followed during the installation. There are still some risks with Elbow-Groove devices even though they get rid of the risks of welding. OSHA rules say that people who work at heights must have the right fall protection, such as harnesses, guardrails, and limited entry zones. To keep muscles and joints from getting hurt, heavy pipe parts should be lifted with motorized aids instead of by hand.
Safety glasses protect your eyes from metal shavings while you cut, work gloves keep your hands safe while you handle parts, and steel-toed boots protect your feet. If cutting operations could create sparks near flammable materials while working in a building that is already occupied, you need to get a hot work permit. Before getting the tools out, go over site-specific safety plans with your crew. Make sure they understand what to do in an emergency and where the first aid station is located.

Step-by-Step Installation Process for Grooved Elbow Fittings
Pipe End Preparation and Measurement
To start, use your cutting tools to cut pipe pieces to the lengths you calculated. Keep vertical cuts within a 1/16-inch limit; angled cuts leave holes that let the gasket push out and eventually leak. Use a deburring tool or file to get rid of all the burrs and sharp edges after cutting. Check the smoothness of the cut edges by running your gloved hand along them, paying attention to both the inner and outer circles.
According to the maker, the distance from the end of the pipe to the center of the groove should be 2 to 2.5 inches. Put a lasting marking on this measurement to make a guideline for where to put the coupling. Clean the ends of the pipes well to get rid of grease, dirt, and oxidation that make it hard for the seal to stick. A clean rag wet with an approved cleaner works well, but don't use petroleum products on EPDM gaskets because they can make them swell.
Fitting Alignment and Assembly
Place the Elbow-Groove fitting so that the direction change you want happens, making sure that the orientation fits the pipe plans. Compared to threaded or flanged connections, Elbow-Groove fittings make alignment easier because they can be rotated while being put together. Moving the seal onto one end of the pipe, make sure it is centered over the groove, and make sure it fits all the way into the groove shape. For the gasket not to blow out under pressure, the inner lip must meet the slot bottom.
Line up the other end of the pipe with the fitting's opposite end, making sure that they fit straight together without cross-threading or pushing. Hold both pipes up well so they don't sag and put stress on the joint. When pipes are lined up correctly, the distance between the ends should be the same all the way around. Variations show that the balance is off and needs to be fixed before the connection is installed. Being patient during this time stops leaks and joint failures from happening again.
Coupling Installation and Torque Specifications
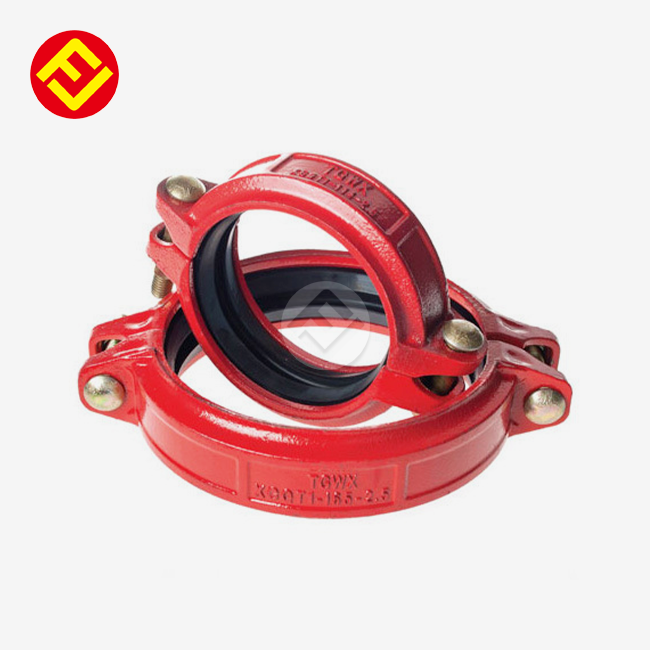
Take the two-piece mechanical connection apart and put the halves over the joint that is covered with a gasket. The coupling housings have keys inside that need to fully contact the pipe gap. Make sure that the seal material doesn't stick out into the bolt pad area. If it does, the housing won't fit together properly. To avoid cross-threading, put bolts through holes that are lined up and start the threads by hand.
To get even gasket compression, tighten the bolts in a star design, switching across the coupling instead of bolts one after the other. Before you start torquing, make sure all of the nuts are finger-tight. Then, go in stages: 50%, 75%, and 100% of the standard. This stepwise method stops the gasket from moving and makes sure that the closing pressure is the same everywhere. Standard setups need 65 to 75 ft-lbs of end torque, but check the coupling manufacturer's instructions for exact requirements. When you over-torque, coupler housings can crack or seals can tear. When you under-torque, the joint can separate during pressure events.
Post-Installation Inspection and Testing
Once the mechanical assembly is done, all parts should be looked at visually. When the torque is right, the coupling housings should sit snug against each other at the bolt points, with regular gaps between them. The gasket material must stay inside the gap and not stick out in any way that can be seen. Make sure that the ends of the pipes are properly supported and don't sag, which could put stress on the joints during operation.
Before the system is turned on, pressure testing makes sure that the fitting was done right. Fill the part slowly, letting out pockets of air that cause pressure spikes. Raise the pressure to at least 150% of its working level and keep an eye on all joints for signs of weeping or leaking for at least 30 minutes. Even small seepage during testing shows possible weak spots that need to be taken apart and fixed. For safety records, write down the test pressures, length, and findings. If the tests go well, it means that your installation meets the safety and style standards.
Troubleshooting and Quality Assurance for Grooved Elbow Installation
Common Installation Challenges
Joint leaking is the most common installation problem, which is usually caused by bad planning or assembly. If leaks show up during pressure tests, the system should be fully depressurized before being looked into. Take off the coupler and check the seal for any damage, movement, or dirt. Gaskets that are squeezed unevenly show flattening or extrusion in certain areas, which can be a sign of alignment issues or trash getting in the way.
Another common problem for elbow groove is misalignment, which happens a lot when there are a lot of direction changes in pipes. When you bend the angle too far, beyond what the maker allows (usually 4 degrees for normal couplings), the stress builds up at the groove ends. This situation might not cause a leak right away, but it does speed up gasket wear, which can cause problems before they should. When hard couplings are used instead of flexible ones, the system can't adapt to changes in temperature, which causes damaging pressures during temperature cycles.
Corrective Measures and Repairs
Fixing leaks starts with taking apart joints and checking parts. Thoroughly clean all surfaces and look for damage that needs to be fixed. Replace any gaskets that were taken off during fixing. When rubber materials are compressed, they lose their memory, which makes them unusable again. Use a depth gauge to check the geometry of the grooves. Damaged grooves make it impossible for the coupling to connect properly, so the pipe piece needs to be replaced.
When problems arise because of misalignment, you should look at the support systems and the pipe lines. You might be able to fix the balance without changing the layout of the pipes by adding intermediate hangers or moving the hangers around. If you switch to bendable connections, they can handle small misalignments while keeping the joint strong. For severe misalignment, the damaged parts have to be cut and put back together again, which is an expensive fix that shows how important it is to be careful with the initial alignment. Write down everything that needs to be fixed, and then try the damaged areas again to make sure that the repairs work as expected.
Long-Term Maintenance Protocols
To keep them working well, Elbow-Groove mechanical systems need to be checked on a regular basis. Visual checks should be done once a year to see if the coating is wearing off, the seal is wearing off, and the connection bolts are tight. Reviews should be done every six months for outdoor systems in harsh settings. Look for rust spots that mean the coating is failing, and fix any problems right away to stop rusting from spreading.
Since inspecting gaskets without taking them apart is hard, pressure testing is a useful way to keep an eye on things. Keep an eye on the system's pressure trends—gradual losses point to new leaks that need to be looked into. After an earthquake or water hammer, check all Elbow-Groove joints for signs of movement, like bolts coming loose or couplings turning. Set up a system to keep track of installation dates, inspection results, and component replacements. This will help you find trends that point to general problems that need to be fixed.
Procurement Considerations and Partnering with Trusted Suppliers
Evaluating Supplier Credentials
Project funds and plans are kept safe by choosing fitting sources that you can trust. Give priority to sellers who have the right certifications, such as ISO 9001 quality management systems that show consistent production methods. For fire safety purposes, parts must have UL and FM ratings, which show they have passed strict safety tests. Check the paperwork from the seller to make sure it meets material standards like ASTM A536 for malleable iron or ASTM A153 for galvanizing.
Delivery times and customizing choices for elbow groove are affected by how well a product can be manufactured. Lead times are faster for suppliers who have their own casting and machining facilities than for wholesalers who get their supplies from outside sources. When coating is done in-house, quality control over the finish's thickness and stickiness is better. When buying in bulk, make sure the production capacity fits the needs of your project by asking for facility checks or inspection reports from a third party. Suppliers that have been around for a while and serve markets around the world know how to deal with foreign quality standards and shipping processes.
Balancing Cost and Quality Factors
To compare prices, you need to look at the total cost of acquisition, not just the unit price. Low-cost Elbow-Groove fittings might not have enough layer thickness, which can cause them to rust quickly and cost more to fix than they saved in the first place. Economy-grade goods have inconsistent sizes, which makes installation more difficult and costs more in labor because it takes longer to fit. When comparing choices, you should figure out the total cost of ownership by adding up the work for installation, the expected service life, and the upkeep that will be needed.
Buying in bulk takes advantage of economies of scale and makes sure that all big projects follow the same specifications. Suppliers with large inventories (tens of thousands of tons) ship common setups right away and offer good savings for buying in bulk. Custom needs usually make wait times longer, but experienced makers can deliver specific sizes in 7–15 business days. When planning your purchases, you should weigh the costs of keeping goods against the costs of faster shipping. For example, you could order standard items early and wait to check the design of custom items until the purchase is confirmed.
Technical Support and Documentation
Technical tools from suppliers add value beyond just supplying goods. Having access to tech support helps with choosing specifications and solving problems that only your team can see during installation. When suppliers give clear installation instructions, torque specs, and repair guides, there are fewer questions and mistakes in the field. Some companies offer training programs that teach your staff how to put together products in a way that works better and faster.
Different types of projects have different documentation needs. For example, public works contracts often need certified mill test records that show the chemical and mechanical qualities of the materials. Make sure that your provider has systems in place that can connect finished fittings to the sources of their raw materials and the production factors. This paperwork is very important for warranty claims and failed reviews because it shows that the manufacturing met the requirements. Responding to technical questions within 24 to 48 hours during buying ensures that projects keep going forward without having to wait for expensive delays while waiting for vendor clarification.

Conclusion
Learning how to install Elbow-Groove fittings correctly is useful for jobs involving fire safety, HVAC, and industrial plumbing. The mechanical connection system's built-in benefits—quick assembly, adaptability in the field, and easy entry for maintenance—directly lead to lower project costs and shorter commissioning times. Your success rests on how well you prepare, how well you match, and how well you check the quality at every step of the installation process. Partner with well-known companies that offer approved goods, full expert support, and dependable delivery. These connections make it possible to get high-quality parts that meet foreign standards. They also provide the information and knowledge that buyers need to make smart choices about what to buy. When put correctly, Elbow-Groove systems last for decades without any problems. This protects your infrastructure investment and makes it easier to make changes and add on in the future.
FAQ
Can grooved elbows handle high-pressure steam applications?
Elbow-Grooves with EPDM seals work for water systems but not for steam systems. For use with steam, you need special high-temperature gaskets that can handle temperatures of 366°F or higher, as well as connections that are made to handle thermal expansion pressures. Before selecting Elbow-Groove systems for boiler connections or condensate return lines, check with makers about steam-rated setups. If you choose the wrong gasket, the system will fail quickly.
How do I determine the correct coupling size for my elbow fittings?
The outside width of the pipe, not its stated size, determines which coupling to use. Make sure you get the right size pipe—a standard 4-inch pipe may have a different OD based on the schedule and the material. Compare this measurement to the coupling's specs, which show the ranges of diameters that are compatible. When you use couplings that are too small, the grooves don't connect properly, and when you use units that are too big, they don't crush enough, both of which cause the joint to fail under pressure.
Are different manufacturers' grooved products interchangeable?
Elbow-Groove valves made to the same standards, like AWWA C606, can usually be used with each other as long as the groove sizes are exactly the same. But makers don't recommend mixing brands in important situations because small differences in tolerance can affect how well the seal works. When a project needs to use more than one source, make sure the dimensions are compatible by inspecting them physically and you might want to do some extra pressure testing to make sure the joints are solid before turning on the system.
Partner with FLA Industrial & Trading Co., Ltd. for Your Grooved Fitting Requirements
Elbow-Groove pipe systems that work well start with high-quality parts made by well-known companies. FLA Industrial & Trading Co., Ltd. has been making precision-engineered pipe fittings out of malleable iron for almost 40 years. They make Elbow-Grooves out of fine ductile iron and carbon steel. We use modern casting technology and tight dimensional controls to make sure that every fitting meets international standards, such as ISO 9001, UL, FM, and CE approvals.
No matter if you need standard 90° Elbow-Grooves for fire safety systems or custom 45° designs for unique HVAC uses, our 2,000-ton inventory and quick 7–15 day custom production keep your projects moving forward. We know that procurement managers care about both the quality of the product and the reliability of the supply chain. That's why our technical team answers within 24 to 48 hours with specs, 3D models, and quotes that are exactly what you need. Get in touch with us at sales@flaindustrial.com to talk about your Elbow-Groove fitting needs with a reliable Elbow-Groove provider that works with Fortune Global 500 companies in the US, Germany, and Australia.
References
American Water Works Association. (2016). AWWA C606-16: Grooved and Shouldered Joints. Denver: AWWA Standards.
ASTM International. (2019). ASTM A536-84: Standard Specification for Ductile Iron Castings. West Conshohocken: ASTM Publications.
Factory Mutual Research Corporation. (2018). FM Approval Guide: Pipe Fittings and Couplings for Automatic Sprinkler Systems. Johnston: FM Approvals.
Nayyar, M. L. (2020). Piping Handbook (8th ed.). New York: McGraw-Hill Professional.
Underwriters Laboratories. (2017). UL 213: Standard for Rubber Gasketed Fittings for Fire-Protection Service. Northbrook: UL Standards.
Victaulic Company. (2021). Grooved Mechanical Piping Systems: Installation Handbook for Contractors and Engineers. Easton: Victaulic Technical Publications.